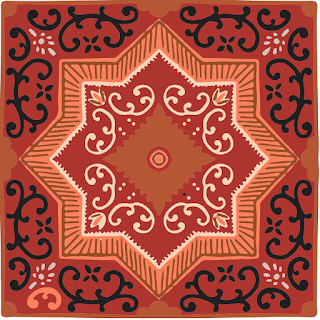
Canva is full of beautiful and creative elements. On top of it, when you see liberty to use them with your pro account, you bring your designs to the next level where people ask you, how did you do it?
Recently I have come to know about the new element “Moroccan Tiles” through one of Diana Munoz posts on her Instagram account. She advised designers to use this element in different designs to give them a more standout look. I tried to give it a try, had some ideas, implemented those in my designs.
These were just a few examples. I believe creative people around can use this element in many different ways.
I have created a total of eight different designs using this element. I have shared these designs on the Facebook group “Canva design circle” and my Instagram account. I was literally over the moon when I saw feedback from Diana Munoz on my designs.
An important design factor here is that all these designs have only one tile design. So, you can imagine how much versatility this one element has in Canva.
Below are the tile designs you can search through the element section.
Let me share the design techniques for all these designs one by one. You can sell these designs on different websites. See below the mock-ups as well I have shared along with each design.
1) For the below design, You just need to reduce the size of your selected tile and arrange them horizontally with one skip one technique. Select any suitable background. Write your desire text in the center.
2) Below designs have been created with the same technique as mentioned above, You just need to add elements like I added “Heart” with curve text in the first design and magnifying glass in the second one.
3) For the below shared first design, I used emojis and applied the text effect “Lift”. For the second one, I skipped empty spaces and added tiles in a row. Downloaded the slide and uploaded it again, reduced the transparency for this one slide. Then used the numbers frame for 2021 and added the same slide which I had uploaded, in each frame one by one. In the last step, I clicked on the image in each frame and increase its size equal to the main slide so that image in the frame matches with the same image in the background.
4) For the below shared first design, I used the circle hallow frame, created six copies with different sizes, and adjusted them with each other together. Added the slide from the upload section as mentioned above in each frame. In the last step, I used the same technique mentioned above (Click on the image in each frame for equal size adjustments) to create symmetry in this circle design. Once you will create the first circle for this tile design, create copies and place them in six on one slide like below.
For the second one, I just used the image in the background from the photo section and placed tiles with one skip one technique above.
5) For the below design I applied the below-mentioned adjustments to the image I uploaded earlier.
6) For the below shared first design, I applied a wobble effect on the first design and adjustments on the second design.
The main purpose behind sharing these designs was to get you familiarized with this element. I am sure this element would be helpful for your designs in the future.


